Showing posts with label diecuts. Show all posts

Simon Says Stamp Favorite Things Release!


Hi Everyone! It's release time at Simon Says Stamp! 

The Simon Says Stamp Favorite Things release is now available! 

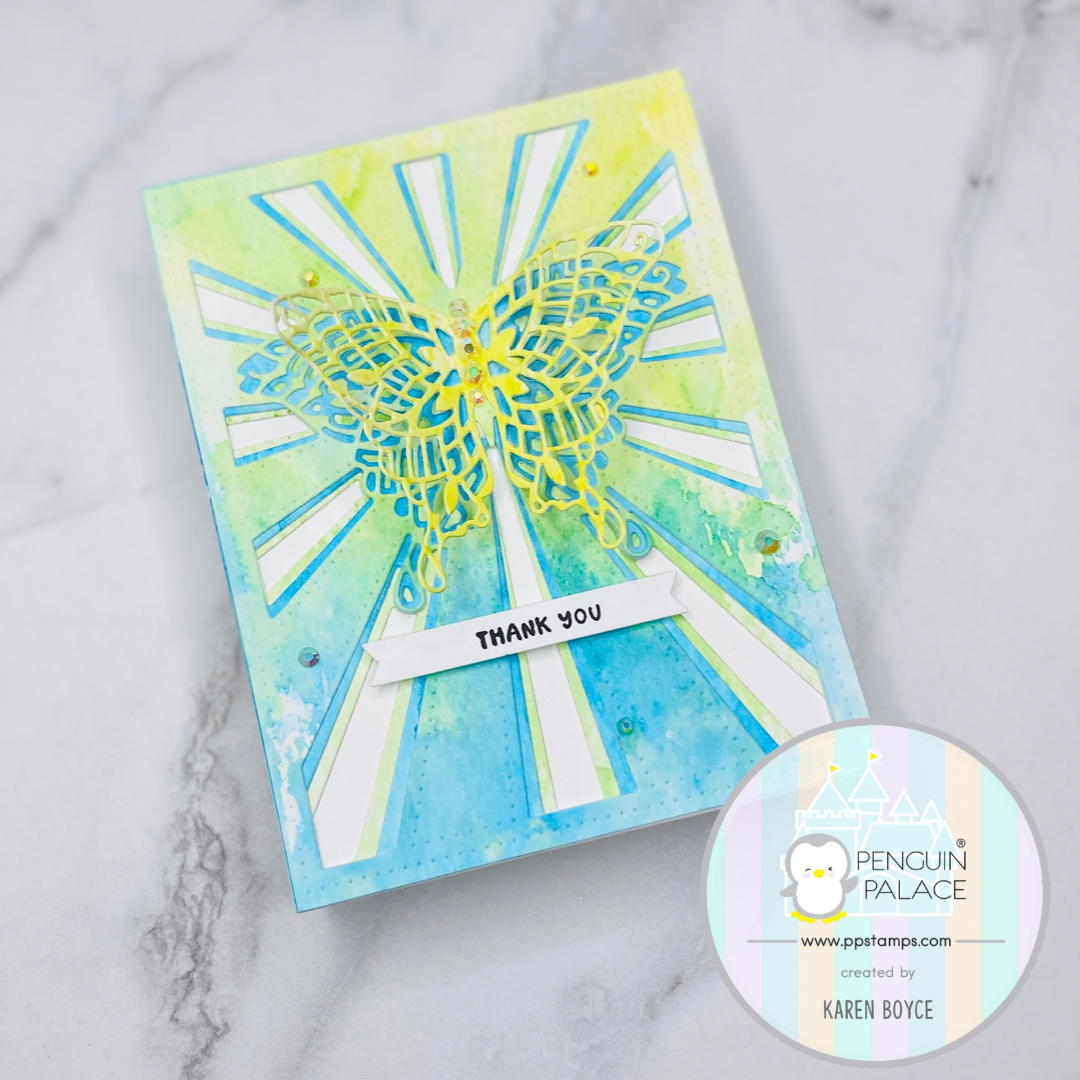
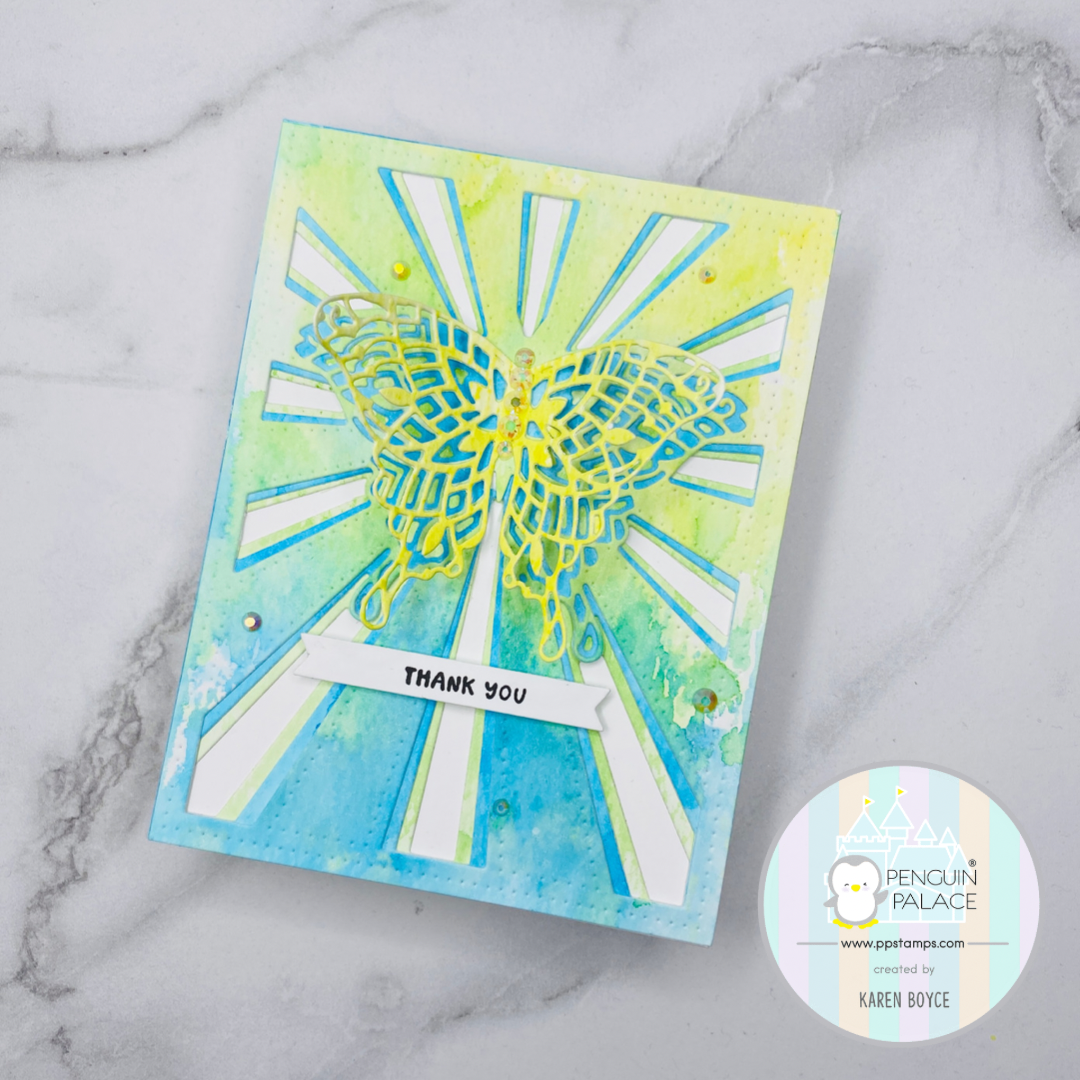
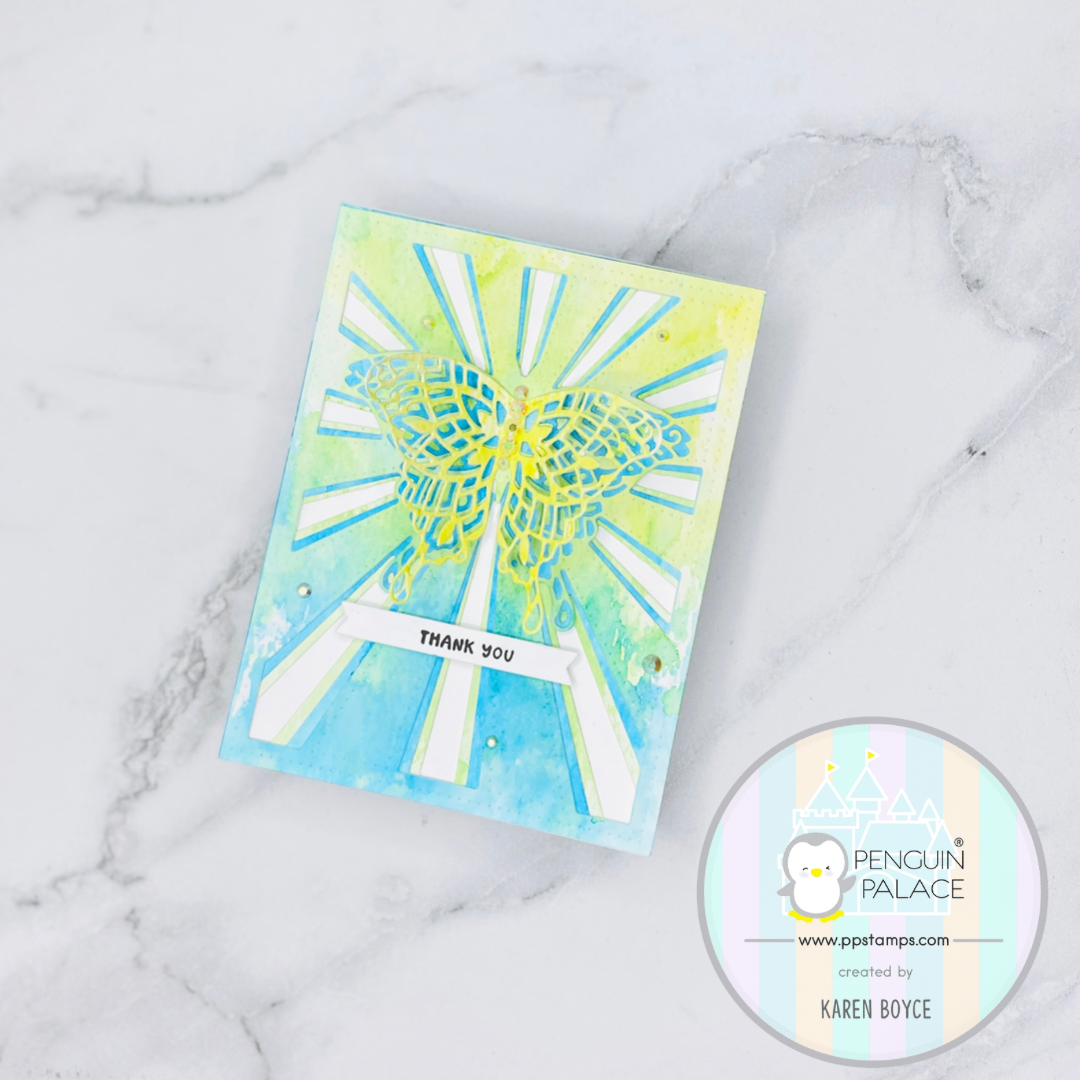
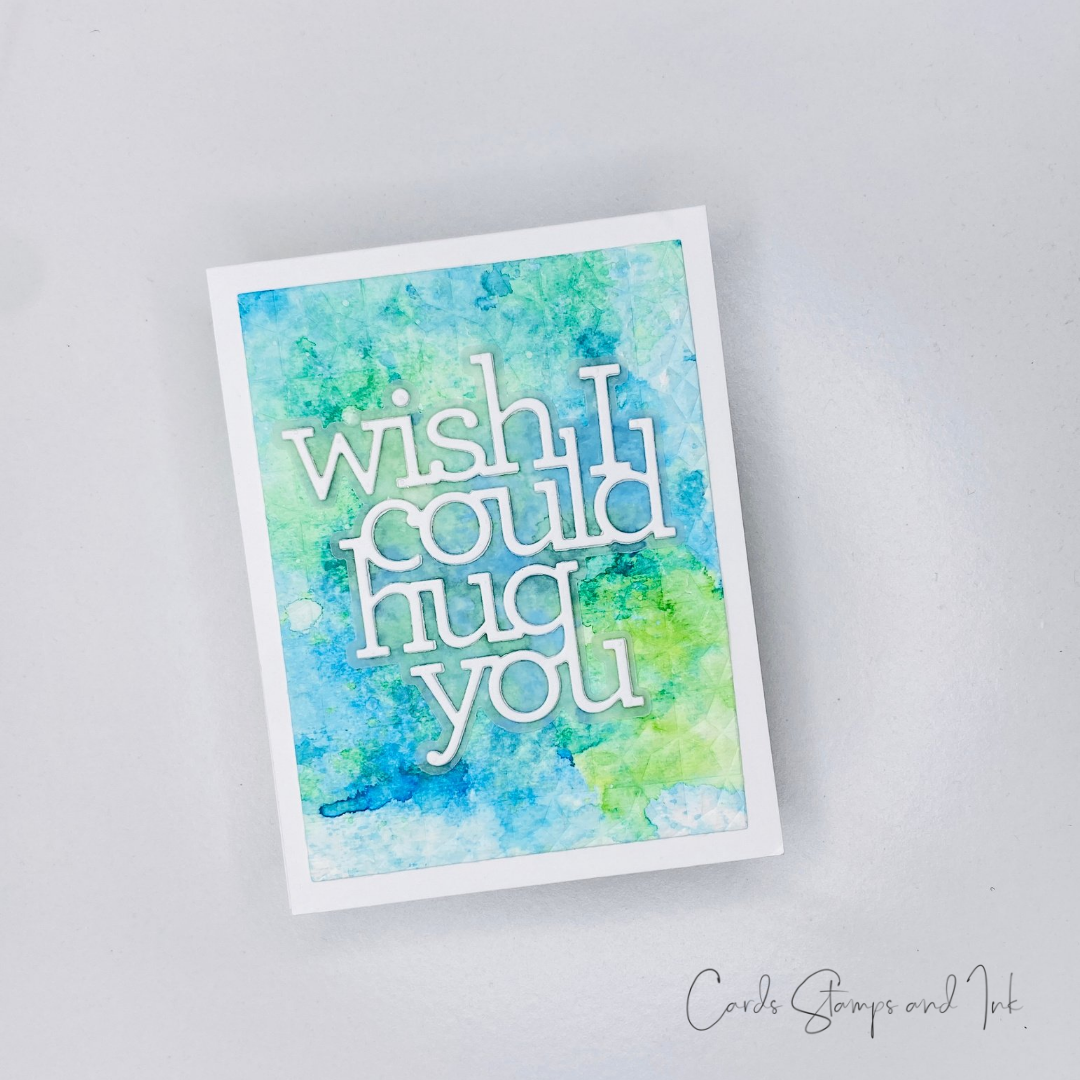
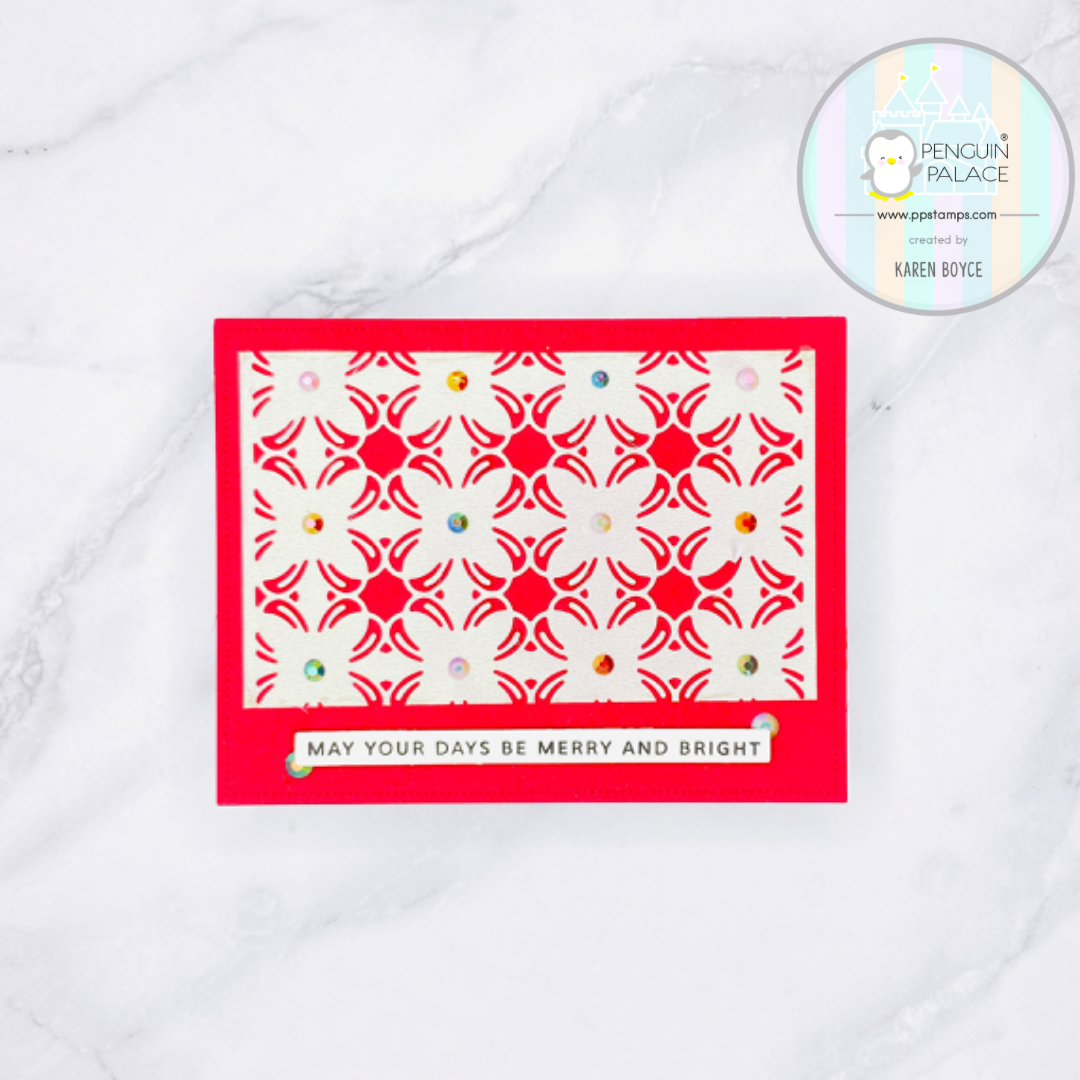
Today I used the new One for the Books stamp Set!


Be sure to follow #SSSFavoriteThings hashtag on Instagram to see all of the awesome inspiration for all the new products in this release from all of the wonderful designers!  


 Happy Crafting!  


 #SSS #simonsaysstamp #SSSFavoriteThings #SSSendACard  #SSSUnitedWeCraft #cardmaking #papercrafting #cardmakers #cardmakingsupplies #cardmaker #handmadecards

#craftyfun


Thank you for stopping by today!  

To see the whole Simon Says Stamp Favorite Things Release  CLICK HERE!


Winter Hugs


Hi Everyone!

Here is a card that I made for the Cold & Frosty Simon Says Stamp Monday Challenge!

First I took an A2 sized panel and embossed it using the Soft Snowball embossing folder which I inked up using the Mermaid Lagoon ink. Then I trimmed 1/8 inch off of each side of the panel and set it aside.

Next I diecut the three snowflakes: Jewel, Marie & Aurora and placed them on a piece of scrap paper. Then I used my Hero Arts glue and covered the top of the snowflakes with glue and lifted them up and placed them on a clean sheet of paper. I opened my Distress Rock Candy glitter and covered the snowflakes. I lifted the snowflakes out of the glitter and set them aside to dry. In the meantime I lifted the clean sheet of paper and saved the remaining glitter back in its container.

Lastly I adhered the card panel to an A2 Card base and then attached the snowflakes to the embossed card panel. I stamped the sentiment from a Simon Says Stamp set from my stash and popped it up with 3D foam tape.

That is it!

Thanks for stopping by today!

Simon Says Stamp DieCember release Blog Party!


Hi Everyone! It's Blog Party Time over at the Simon Says Stamp Blog!

Today I am sharing another card that I made using the new Simon Says Stamp Eucalyptus Branch die!

Look at the versatility of this die! The card I made on the post before this one has it!


Thank you for stopping by today! 

 #simonsaysstamp
 #SSSDieCember2024 #SSSDieCember #SimonSaysStamp #SSSendACard #SSSUnitedWeCraft
#cardmaking #papercrafting #cardmakers  #cardmakingsupplies #cardmaker #handmadecards #craftyfun 

To see the whole Simon Says Stamp December release CLICK HERE!


Simon Says Stamp DieCember release!


Hi Everyone! It's new release time over at the Simon Says Stamp!

Today I am sharing a card that I made using the new Simon Says Stamp Eucalyptus Branch die!

Look at the versatility of this die! The card I made on the next post!

Thank you for stopping by today! 

 #simonsaysstamp
#cardmaking #papercrafting #cardmakers  #cardmakingsupplies #cardmaker #handmadecards #craftyfun 

To see the whole Simon Says Stamp December release CLICK HERE!


Simon Says Stamp Be Creative Release!


Hi Everyone! It's time for the new Be Creative release at Simon Says Stamp!
Today I used the new Parallelogram Background stamp and coloured it in with my Copic Markers!
Be sure to folllow #SSSBeCreative hashtag to see all of the awesome inspiration for all the new products in this release from all of the wonderful designers!   Happy Crafting!#SSSBeCreative  #simonsaysstamp #SSSendACard  #SSSUnitedWeCraft #cardmaking #papercrafting #cardmakers #cardmakingsupplies #cardmaker #handmadecards
#craftyfun
Thank you for stopping by!

Simon Says Stamp DieCember release!


Hi Everyone! The Simon Says Stamp DieCember release  is now available! Today I used the new Radiant die!


Be sure to follow #SSSDieCember hashtag to see all of the awesome inspiration for all the new products in this release from all of the wonderful designers!   Happy Crafting!  


#simonsaysstamp #SSSendACard  #SSSUnitedWeCraft #cardmaking #papercrafting #cardmakers #cardmakingsupplies #cardmaker #handmadecards


Thanks for taking a look at my blog today! 

BONUS Card!!!


 #simonsaysstamp #sssDiecember #SSSendACard #SSSUnitedWeCraft
 #cardmaking #papercrafting #cardmakers  #cardmakingsupplies #cardmaker #handmadecards #craftyfun 

Here is a link to the entire Diecember release! 

Here are links to the products used to make my card: 


Altenew You are Loved!


A little something...


Happy Monday Everyone! 

Today I am sharing a card that I made using the Tulip Bouquet stamp and die from Hero Arts!

Hugs!


Hi Everyone! Here is a card that I made that started out as ink blending a stencil.


When I sit down to craft I usually just pull out the goodies that I want to use and just play. This is a perfect example of that . 


I knew that I wanted to ink blend over this Sphere stencil from Altenew- which I did however I did not know how the card would come together. It wasn't until the next day that I looked at my ink blending again and had an idea!


I pulled out my Hero Arts Nesting Circle dies and found one that matched the size of the sphere and die cut it out. Next I pulled out an A2 panel of Neenah 110# paper and dry embossed it with the Dotted Swirls debossing cover die from Altenew.   I adhered the debossed panel to my A2 Card base made out of Neenah Classic Crest Solar White Cardstock.


 I adhered the sphere on top of that. Next I used the Hugs sentiment from Altenew Script Words  and diecut it 3 times from white cardstock and once from SImon Says Stamp Matte gold mirror cardstock and adhered the all together. I placed the gold sentiment slightly offset from the white sentiments. I added a few gems and that is it! 


Thank you for stopping by  today!


#altenew 

#adultcoloring #adultcolouring #cardmaking #papercrafting #cardmakers #cardmakingsupplies #cardmaker #handmadecards #craftyfun

Card for Ukraine...Thinking of you.


#cardsforukraine

#LetThereBePeace

You're Amazing!


 Happy Monday Everyone!

Just a friendly reminder!


Thank you!


Hi Everyone! I am back today sharing a card with you that I made with Penguin Palace goodies! 


I just love this Butterfly Emergence die set! I've made several cards with it! 


There are so many ways that you can use it to make cards for all occasions! 

  
For today's card I used almost the entire die set!


I first took out my Tim Holtz Watercolor paper and ink smooshed some Ink On Three Inks- Bee Sting Yellow and Peacock Blue Ink pads onto my Tim Holtz glass mat. 

I spritzed the ink with water and then dabbed my paper into the ink. I let it dry in between each of the layers of ink. I repeated the process for each of the 4 diecuts that I used. 


Once the panels were dry I die cut them using the Butterfly emergence layer dies. I adhered the background piece to my 110# Neenah card base with my Gina K connect glue. Then I layered the panels up. Next I added some glue to the body of the butterfly and adhered it to the panel. I added some gems to the body of the butterfly and on the card panel. I then stamped the sentiment from Let's meet IRL stamp set and made a sentiment strip and popped it up with some 3M foam tape. 
Thats it! 

Thank you for stopping by! 

Hello!


Hi Everyone!  Do you love playing with alcohol Inks? I do. Here is a quick card that I made with some Alchemy Alcohol ink pearls and a die cut Hello from Simon Says Stamp! 


@ranger_ink @simonsaysstamp#simonsaysstamp #ranger_ink#alcoholink #alcoholinkpearls#youareloved #cardmaking#papercrafting #handmadecards#craftyfun

Happy Birthday!


Hi Everyone!  Here is a card that I made a card by embossing a watercolour background that I made with my Ink On 3 inks and the Happy Birthday die and shadow from Simon Says Stamp and CZ designs. 


@simonsaysstamp  #SimonSaysStamp #SSSendACard #SSSUnitedWeCraft 

#cardmaking #papercrafting #cardmakers #cardmakingsupplies #cardmaker #handmadecards

#craftyfun


Don't miss out on FREE REGISTRATION to the Cardmakers Success Summit!!!!

I'll be there to share my tips on making some Alcohol Ink cards! Join me!


Wish I could hug you!


Hi Everyone!  It’s National Hug day! 


Today I am sharing a card that I made with an easy “watercolour” background, an embossing folder and sentiment from Simon Says Stamp! 


First I took a piece of Tim Holtz distress watercolour paper and die cut it a bit smaller than A2 size. I spritzed the panel with water by using my Distress spray bottle. Then I smushed the  Ink on 3 Peacock Blue & Bee Sting Atelier inks on my Tim Holtz glass mat. I spritzed that ink with some water. Next I took the cut down piece of watercolour panel  and lay it in the ink and moved it around until it was fully covered and then set it aside. 


While that watercolour panel was drying I took a piece of Neenah paper and cut out the Wish I could Hug you die three times and adhered them together. Next I cut out the sentiment shadow out of some vellum and adhered it to the diecut sentiment. 


Now that the watercolour panel is dry I put it into the embossing folder and ran it through my diecut machine. I adhered the whole sentiment and shadow to the embossed watercolour panel and then to an A2 card base made from Neenah 110# paper and that is it!


Thanks for stopping by!


@simonsaysstamp

#SimonSaysStamp #SSSendACard #SSSUnitedWeCraft #SSSIGchallenge

#cardmaking #papercrafting #cardmakers #cardmakingsupplies #cardmaker #handmadecards

#craftyfun


Don't miss out on FREE REGISTRATION to the Cardmakers Success Summit!!!!

I'll be there to share my tips on making some Alcohol Ink cards! Join me!


Nine most liked Posts for 2021!


Hi everyone! Here are my top nine posts for 2021! THANK YOU ALL for the comments and for following my crafty journey!  I look forward to sharing more with you all in 2022! 🥰💜#cardmaking #papercrafting #cardmakers#cardmakingsupplies #cardmaker #craftyfun

May your days be Merry & Bright!


Hi Everyone! Here are some holiday cards that I made using the Penguin Palace Floral Garden Coverplate die! 


                                            First I cut out the Floral Garden die out of some pearlescent vellum. 


I cut it into two and placed it on panels that I made out of Santa card stock and Teal sapphire.
 Don't you love to make 2 for one cards?


 I adhered the respective die cut pieces to the panels and then added some gems to the centre of each flower. 

I then added sentiments from the Magical Christmas Sentiments stamp set and popped them up with some foam tape.


. That’s it! Quick and easy Holiday cards!

Have you made your holiday cards yet? 

This is available at now at Penguin Palace Stamps and Simon Says Stamp!